
The allure of Moroccan design lies in its seamless blend of tradition, artistry, and functionality. Among its most celebrated techniques is tadelakt, a plastering method that transforms ordinary walls into stunning, waterproof surfaces with a glossy, marble-like sheen. Originating from the ancient palaces and hammams of Morocco, tadelakt offers a unique aesthetic that elevates modern interiors while honoring centuries-old craftsmanship. This article delves into the intricate process of painting walls with a Moroccan tadelakt finish, guiding you through every step with precision and care. Whether you’re a DIY enthusiast or a professional designer, mastering this technique promises to infuse your space with timeless elegance. Beyond its visual appeal, tadelakt is eco-friendly and durable, making it a sustainable choice for contemporary homes. Let’s explore the materials, methods, and secrets behind achieving this luxurious finish.
Understanding the Essence of Tadelakt
Tadelakt is more than just a wall finish—it’s a cultural artifact rooted in Morocco’s architectural heritage. Traditionally made from lime plaster, this material is applied in layers and polished to create a smooth, lustrous surface. Unlike conventional paint, tadelakt is naturally water-resistant, thanks to a unique combination of lime and a soap-based sealant. Its versatility allows it to grace bathrooms, kitchens, and even outdoor spaces. The technique dates back to the Berber people, who valued its ability to withstand humidity in steam baths. Today, it’s prized for its organic texture and subtle color variations, often achieved with natural pigments. To embark on this journey, you’ll need to understand its core principles: preparation, application, and preservation. This sets the stage for a flawless finish that rivals the grandeur of Moroccan riads.
Gathering the Right Tools and Materials
Success with tadelakt begins with the proper toolkit. You’ll need authentic Moroccan lime plaster, which differs from standard plaster due to its high calcium content and fine grain. Source this from specialty suppliers like Kremer Pigments, known for high-quality traditional materials. Other essentials include a stainless-steel trowel for application, a plastic float for smoothing, and a polishing stone—typically a smooth river rock—for the signature gloss. Natural pigments, such as ochre or cobalt, allow for custom hues, while olive oil soap (often black soap) seals the finish. A mixing bucket, protective gloves, and a dust mask round out your supplies. Avoid synthetic alternatives, as they compromise authenticity and durability. Investing in these materials ensures your tadelakt finish mirrors the craftsmanship of Moroccan artisans.
Preparing Your Wall for Perfection
A flawless tadelakt finish hinges on meticulous wall preparation. Start with a clean, dry, and structurally sound surface—cracks or dampness will undermine the plaster’s adhesion. For new walls, apply a base coat of lime render to create a grippy texture. Existing painted surfaces require sanding to remove gloss and enhance bonding. Dust and debris must be swept away, as even small particles can mar the final look. If working in a wet area like a bathroom, consider a waterproof backing layer, as advised by experts at Fine Homebuilding. Test your wall’s absorbency by sprinkling water; if it beads up, further sanding is needed. This prep work, though time-consuming, lays the foundation for a finish that’s both beautiful and enduring.
Mixing Tadelakt Plaster Like a Pro
The magic of tadelakt begins with the mix. Combine Moroccan lime plaster with water in a clean bucket, aiming for a creamy, lump-free consistency. A ratio of one part water to two parts plaster is a good starting point, but adjust as needed—too thick, and it won’t spread; too thin, and it won’t hold. Add natural pigments at this stage for color, stirring thoroughly to avoid streaks. Traditionalists recommend mixing by hand to feel the texture, though a slow-speed drill mixer works too. Let the mixture rest for 15 minutes to hydrate fully, a step Moroccan artisans swear by for optimal workability. This process, detailed in resources like The Lime Centre, ensures your plaster is ready to transform your walls.
Applying the First Layer with Precision
With your plaster mixed, it’s time to apply the first layer. Using a stainless-steel trowel, spread a thin, even coat—about 1/8 inch thick—over the prepared wall. Work in small sections, moving from bottom to top to avoid drips. Hold the trowel at a 45-degree angle, pressing firmly to bond the plaster to the surface. Don’t rush; tadelakt rewards patience. If air bubbles appear, smooth them out with a plastic float. This base layer sets the tone for the finish, so aim for uniformity. Let it dry for 12 to 24 hours, depending on humidity—touch it lightly; it should feel firm but not fully cured. This step builds the structural integrity that defines authentic tadelakt.
Adding Depth with the Second Layer
The second layer brings tadelakt to life. Apply another thin coat over the first, using the same trowel technique. This time, focus on creating subtle texture—slight ridges and waves add character, mimicking the handcrafted look of Moroccan walls. As it begins to set (usually within 30 minutes), smooth the surface with a plastic float in circular motions. Timing is critical: too wet, and it smears; too dry, and it won’t polish. Check your progress with a light touch—tackiness is ideal. This layer, often refined over generations, enhances both aesthetics and durability. For inspiration, Architectural Digest showcases tadelakt’s depth in modern designs, proving its timeless appeal.
Polishing to a Lustrous Sheen
Polishing is where tadelakt earns its marble-like glory. Once the second layer is tacky but not wet—typically an hour after application—rub the surface with a smooth stone in small, circular motions. Apply steady pressure to compress the plaster, closing tiny pores and boosting shine. This traditional method, honed by Moroccan craftsmen, requires elbow grease but delivers unmatched results. Work in sections to maintain consistency, wiping the stone clean as residue builds up. If the surface feels too dry, lightly mist it with water using a spray bottle. Polishing can take hours for large walls, but the glossy payoff is worth it—a finish that reflects light and resists water naturally.
Sealing with Olive Oil Soap
To lock in tadelakt’s beauty and waterproofing, seal it with olive oil soap. Dilute black soap with water (a 1:10 ratio works well) and apply it with a soft cloth or sponge, rubbing it into the polished plaster. This saponification process reacts with the lime, forming a protective layer that repels moisture—a trick that’s kept Moroccan hammams pristine for centuries. Work in thin, even coats, letting each dry for a few hours before adding another. Two to three applications suffice for most walls. Avoid over-saturating, as it can dull the sheen. This step, endorsed by Green Building Supply, ensures your finish thrives in humid environments like bathrooms.
Curing and Maintaining Your Masterpiece
Tadelakt isn’t fully complete until it cures. Over the next 30 days, the lime plaster carbonates, hardening into a durable shell. Keep the room ventilated but avoid direct heat or drafts, which can cause cracking. Mist the walls lightly with water daily for the first week to aid curing—too much moisture, though, risks efflorescence (white powdery spots). Once cured, maintenance is simple: wipe with a damp cloth and reapply diluted soap annually to refresh the seal. Avoid harsh chemicals, as they erode the lime. This curing phase perfects the finish, ensuring it lasts for decades with proper care.
Troubleshooting Common Tadelakt Challenges
Even seasoned DIYers face hurdles with tadelakt. Cracks may appear if the plaster dries too fast—mist the wall and apply thinner layers next time. Uneven polish often stems from inconsistent pressure; practice on a test board first. If the finish feels rough, you may have skipped smoothing between layers—sand lightly and repolish. Pigment streaks signal poor mixing; always blend thoroughly. For stubborn issues, consult Traditional Building, a treasure trove of plastering wisdom. Patience and practice overcome most pitfalls, turning mistakes into learning curves on your path to mastery.
Comparing Tadelakt to Other Finishes
To appreciate tadelakt’s uniqueness, consider how it stacks up against alternatives. A simple table highlights key differences:
| Finish | Durability | Waterproofing | Aesthetic | Eco-Friendliness |
|---|---|---|---|---|
| Tadelakt | High | Excellent | Glossy, Organic | Very High |
| Venetian Plaster | Moderate | Poor | Smooth, Polished | Moderate |
| Latex Paint | Low | Moderate | Flat, Uniform | Low |
Tadelakt outshines Venetian plaster in waterproofing and eco-friendliness, while latex paint falls short in durability and charm. This comparison underscores why tadelakt reigns supreme for statement walls.
Enhancing Your Space with Tadelakt
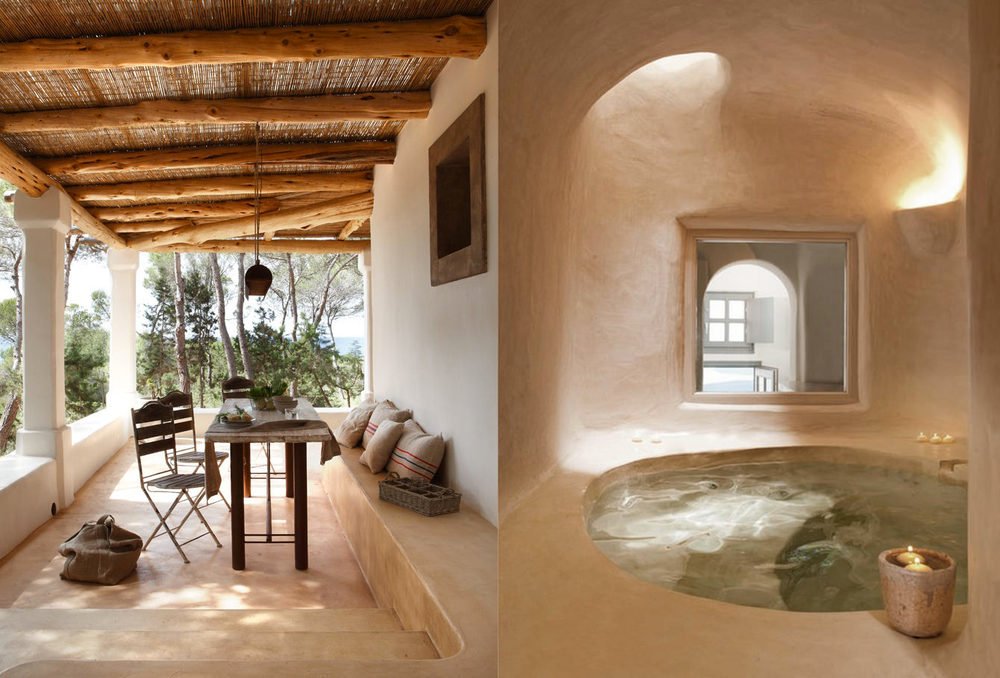
Beyond technique, tadelakt transforms interiors with its earthy elegance. Use it as an accent wall in living rooms or a full finish in bathrooms for a spa-like retreat. Pair it with natural materials—wood, stone, or woven textiles—for a cohesive Moroccan vibe. Its muted tones, from terracotta to sage, complement minimalist and bohemian styles alike. Lighting enhances its sheen, so position lamps to highlight the texture. This versatility makes tadelakt a designer’s dream, as noted by Dwell, bridging ancient craft with modern flair.
FAQs About Tadelakt Finishes
What makes tadelakt different from regular plaster?
Tadelakt’s lime-based formula and soap sealing give it superior waterproofing and a glossy finish, unlike standard plaster’s matte, porous nature.
Can I apply tadelakt over painted walls?
Yes, but sand the paint first to ensure adhesion. A lime render base coat helps too.
How long does tadelakt take to apply?
For a small room, expect two to three days for application and polishing, plus a month for curing.
Is tadelakt suitable for kitchens?
Absolutely—its water resistance and durability make it ideal for splash zones.
Can I fix mistakes after it dries?
Minor flaws can be sanded and repolished, but major errors may require reapplication.
Conclusion: A Legacy Worth Crafting
Painting walls with a Moroccan tadelakt finish is more than a project—it’s an immersion into a storied art form. From mixing lime plaster to polishing with river stones, each step weaves tradition into your home. The result is a surface that’s as practical as it is breathtaking, blending sustainability with sophistication. While the process demands time and skill, the reward is a bespoke wall that tells a story of craftsmanship and culture. Whether gracing a bathroom or a living space, tadelakt stands as a testament to the beauty of hands-on creation. Embrace this journey, and you’ll not only master a technique but also craft a legacy of elegance that endures.