
The allure of Moroccan design lies in its intricate patterns, vibrant colors, and timeless craftsmanship. Among its most iconic elements are Moroccan lanterns, which cast mesmerizing light patterns that transform any space into an exotic retreat. Crafting your own DIY Moroccan lanterns offers a rewarding way to personalize your home decor while embracing this rich cultural aesthetic. This guide dives deep into the process, from understanding the history and styles to gathering materials and mastering techniques. Whether you’re a seasoned DIY enthusiast or a beginner, this article provides everything you need to create stunning lanterns that elevate your living space.
The Historical Charm of Moroccan Lanterns
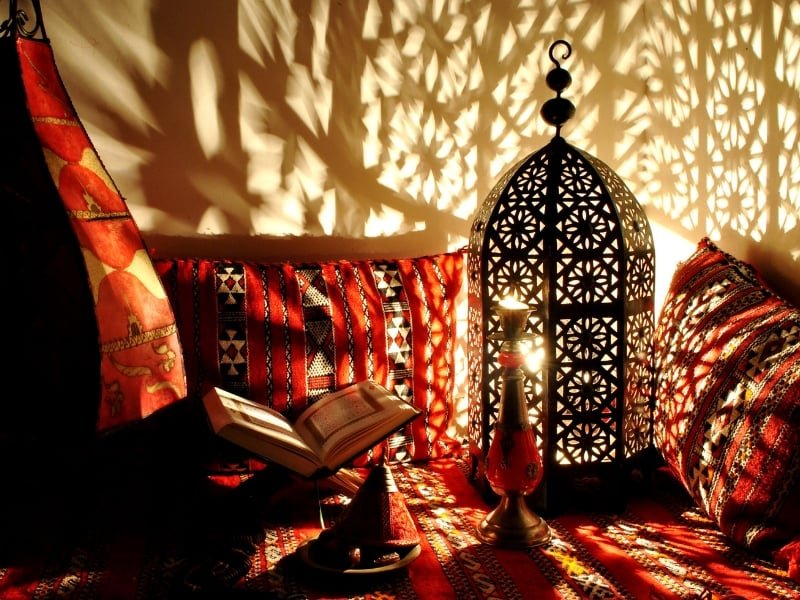
Moroccan lanterns, or fanous, trace their origins to centuries-old traditions of North African craftsmanship. Initially designed as functional lighting for homes and mosques, they evolved into decorative masterpieces blending metalwork and stained glass. Artisans used geometric patterns and arabesques to reflect Islamic art principles, avoiding human or animal depictions. Today, these lanterns symbolize hospitality and beauty, making them a popular choice for home decor worldwide. By crafting your own, you connect with this heritage while adding a personal touch to a time-honored design.
Why Choose DIY Moroccan Lanterns for Your Home?
Opting for a DIY approach offers unmatched flexibility. Store-bought lanterns can be costly and lack individuality, whereas crafting your own lets you tailor colors, sizes, and patterns to your taste. This project also saves money, as materials like mason jars, metal frames, or even recycled items can be repurposed. Beyond practicality, the process is therapeutic—cutting, painting, and assembling fosters creativity and mindfulness. The result? A unique piece that enhances your home’s ambiance, from cozy living rooms to enchanting patios, with a story you can proudly share.
Essential Materials for Your DIY Moroccan Lantern
Before starting, gather the right supplies. You’ll need a base structure—mason jars, tin cans, or wire frames work well. Glass paint or tissue paper mimics stained glass, while metallic spray paint adds an authentic sheen. Tools like a hot glue gun, scissors, and a hole punch are indispensable for assembly. For intricate designs, consider stencils or a steady hand with a paintbrush. LED tea lights or fairy lights provide safe, flickering illumination. Source quality materials from craft stores or online retailers like Hobby Lobby for reliable options that ensure durability and aesthetic appeal.
Selecting the Perfect Design Style
Moroccan lanterns come in diverse styles, each with distinct flair. Traditional designs feature star-shaped cutouts and filigree metalwork, casting dramatic shadows. Modern interpretations might use bold colors like turquoise or simplify patterns for a minimalist look. Decide whether you prefer a hanging lantern, a tabletop centerpiece, or a wall-mounted sconce. Researching Moroccan interior trends can inspire your vision—geometric symmetry for a classic feel or vibrant mosaics for a contemporary twist. Your design choice sets the tone for the project, so align it with your home’s existing decor.
Step-by-Step: Building the Lantern Base
Begin with your chosen base. For a mason jar, clean it thoroughly and remove labels. If using tin cans, wash and dry them, then punch holes in a pattern using a hammer and nail—star or crescent shapes work beautifully. Wire frames require bending into a lantern shape, secured with pliers. Safety is key: wear gloves to avoid sharp edges. This foundation determines your lantern’s structure, so take time to perfect it. A sturdy base ensures your decorative elements shine without compromising functionality, setting the stage for the next creative steps.
Adding Moroccan-Inspired Patterns
The magic of Moroccan lanterns lies in their patterns. Trace designs onto your base using stencils or freehand sketches—think stars, diamonds, or interlocking curves. For metal, cut out shapes with a craft knife or drill; for glass, paint with translucent colors like amber or sapphire. Tissue paper layered with glue can simulate stained glass on jars, offering a budget-friendly alternative. Precision matters—uneven cuts or smudged paint detract from the elegance. Study traditional Moroccan motifs for authenticity, ensuring your lantern captures the essence of this art form.
Incorporating Color and Texture
Color brings your lantern to life. Traditional palettes favor rich hues—ruby red, cobalt blue, and golden yellow—often paired with metallic finishes like brass or copper. Spray paint metal bases for a polished look, or use glass paint for a translucent glow. Add texture with beads, tassels, or etched designs for extra dimension. Balance is crucial; too many embellishments can overwhelm the design. Test your color scheme in different lighting to ensure it complements your space, drawing inspiration from color theory basics.
Assembling and Lighting Your Lantern
Once decorated, assemble your lantern. Secure loose pieces with hot glue or wire, ensuring stability. For hanging lanterns, attach a handle using sturdy twine or chain. Insert lighting—LED tea lights are safe and energy-efficient, while fairy lights add whimsy. Test the glow to see how patterns project onto walls; adjust placement if needed. This step marries form and function, transforming your creation into a working piece of art. A well-lit lantern not only illuminates but also casts the intricate shadows that define Moroccan style.
Comparison Table: DIY vs. Store-Bought Moroccan Lanterns
| Aspect | DIY Moroccan Lanterns | Store-Bought Lanterns |
|---|---|---|
| Cost | Low (materials-based) | High (retail markup) |
| Customization | Fully customizable | Limited options |
| Time Investment | Moderate to high | None (ready-made) |
| Uniqueness | One-of-a-kind | Mass-produced |
| Skill Development | Enhances crafting skills | None required |
This table highlights why DIY often trumps convenience, offering cost savings and creative control over pre-made alternatives.
Enhancing Your Home with DIY Lanterns
Placement amplifies your lantern’s impact. Hang them from ceilings for a dramatic focal point or cluster them on a patio for an outdoor oasis. Tabletop versions suit dining areas, casting warm light during meals. Pair with Moroccan rugs or cushions for a cohesive look—explore home decor styling tips for ideas. Their versatility makes them ideal for seasonal decor, too; swap colors for holidays or events. Thoughtful positioning ensures your lanterns enhance both aesthetics and atmosphere year-round.
Troubleshooting Common DIY Challenges
Mistakes happen, but they’re fixable. Uneven cuts in metal? Sand edges smooth. Paint runs on glass? Wipe with acetone before it dries. If light doesn’t shine through, thin your paint or widen cutouts. Patience is your ally—rushing leads to errors. For complex issues, online forums like DIY Network offer expert advice. Embrace imperfections as part of the handmade charm; they add character to your lantern, distinguishing it from mass-produced pieces.
Sustainability in Lantern Crafting
Eco-conscious crafters can make sustainable choices. Repurpose old jars or scrap metal instead of buying new materials. Opt for non-toxic paints and LED lights to reduce environmental impact. This aligns with Moroccan traditions of resourcefulness, where artisans historically used available materials. Not only does this lower your carbon footprint, but it also adds a narrative of renewal to your decor. Learn more about sustainable crafting to refine your approach, blending beauty with responsibility.
Cost Breakdown and Budgeting Tips
Expect to spend $10–$30, depending on materials. Jars and LEDs are cheap, but specialty paints or tools add up. Shop sales at craft stores or repurpose household items to cut costs. Budgeting ensures you enjoy the process without financial strain. Compare prices online—sites like Michaels often have deals. A well-planned budget keeps your project affordable, letting creativity flourish without breaking the bank.
FAQs About DIY Moroccan Lanterns
What skill level is required?
Basic crafting skills suffice—cutting, painting, and gluing are manageable for beginners, though precision improves with practice.
How long does it take?
A simple lantern takes 2–4 hours; intricate designs may span a weekend.
Are they safe for outdoor use?
Yes, with weatherproof materials and LED lights, they withstand elements well.
Can kids help?
With supervision, yes—stick to safe tasks like painting or decorating.
Where can I find inspiration?
Pinterest, Moroccan art books, or online galleries spark ideas tailored to your style.
Conclusion: Illuminating Your Space with Handmade Beauty
Creating DIY Moroccan lanterns merges artistry, history, and practicality into a single, fulfilling project. From selecting materials to perfecting patterns, each step builds a piece that’s uniquely yours, steeped in cultural resonance. These lanterns do more than decorate—they tell a story of creativity and connection, casting light and shadows that elevate your home’s soul. Whether you craft one or a dozen, the process rewards you with skills, savings, and a stunning decor statement. Dive in, and let your handmade lanterns illuminate both your space and your spirit with timeless Moroccan elegance.